On Ilkley Moor Bah Tat
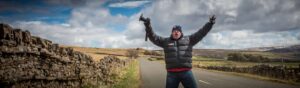
A bright mid-morning trip up to the Cow and Calf is a lovely way to start a bank holiday Monday. Light breeze, nice patterned clouds and nice shadows were what we were greeted with.
The ND Grad Problem
Thing is, using ND Grad filters to keep detail in the sky would blacken the top of the rocks. So to get both nice, bright rocks, and the sky, I took 3 shots of each scene (dark, normal and light) and then used Photomatix V 4.2 to blend them together to get the best from all 3 shots.
Working smart
Using the same techniques taught in McFade’s HDR Masterclass, I created one finished image, then batch processed the rest of the shots to the same settings, working smartly increases your efficiency
Finishing off in Lightroom 4
What pops out of Photomatix V4.2 can be stunning in its own right – gone are the days of “cartoon-like” images which need hours of work in Photoshop. You will probably want to tweak the results though, so Lighroom 4 is the perfect tool.
You can tweak colours, make selective adjustments – maybe bring out detail in a wall, add contrast to a sky, brighten up the main focal point.
In this gallery, I’ve added in a few examples from a shoot which lasted about 30 minutes – right up until the sun disappeared behind a HUGE cloud!
Photos
So in this set, the HDR had the same settings for each shot and the “effect” was added in Lighroom afterwards.
In order we have..
- Normal black and white look
- Natural colour HDR – little added in LR
- Extra detail added in LR – using Clarity etc.
- Pseudo “Bleach Bypass” in LR
- High contrast black and white
- Natural HDR
- Pseudo cross processing
- Normal black and white look