Smartphone Photography Tips For Beginners
Mastering the Settings: Tips for Configuring Your Smartphone Camera
Knowing your way around the settings menu on your smartphone camera can make a world of difference. By fine-tuning certain settings, you can take far more professional-looking shots without needing to carry around extra equipment. Here, we focus on two elementary yet vital tweaks: enabling the grid and turning off the flash.
Switch On The Grid: Frame Your Photos Like a Pro
Ah, the humble grid. It’s one of those features that’s often ignored but can make a massive impact on your photography. The grid overlay breaks down your frame into nine equal parts, divided by two vertical and two horizontal lines. This directly ties into the rule of thirds, which we mentioned earlier. By enabling the grid, you can visually align your subjects and landscapes along these lines or intersections, instantly improving your composition.
Example here – the person is where the left line of the grid would be – his head is where the top and left lines intersect.

To switch it on, you usually go to the settings menu within your camera app and look for the grid option. Once activated, you’ll see faint lines overlaying your camera view. Use these lines as a guide to place key elements in your scene. For instance, position the horizon along one of the horizontal lines or your subject at one of the intersections. It’s a simple tweak that offers an immediate boost to your composition skills. Trust me, the grid’s worth its weight in gold—or in this case, pixels.
Turn Off The Flash: Natural Light is Your Best Friend
Here’s a newsflash for you—most built-in flashes on smartphones are, let’s face it, rubbish. They often create harsh lighting conditions, blow out highlights, and can give subjects that dreaded red-eye effect. In essence, the flash can be an enemy of a good photograph more often than not.
Turning off the flash and relying on natural light can work wonders for your photos. Natural light offers a softer, more diffused look that evenly illuminates your subject, making for a more appealing shot. If you’re indoors, try positioning your subject near a window where natural light flows in, or wait for the golden hours (early morning or late afternoon) for some of the best natural lighting conditions outdoors.
To disable the flash, tap the flash icon in your camera app and choose the ‘off’ setting. Sometimes you’ll find this represented as a lightning bolt symbol crossed out. Remember, while there might be situations where flash is necessary, like truly low-light conditions, it’s usually best to leave it off and let Mother Nature do the lighting for you.
Navigating Advanced Controls: Focus and Sliders Explained
Sometimes a slight tap or a tiny slide can be the difference between a mediocre shot and a masterpiece. So let’s discuss tapping to focus, along with the sliders for exposure compensation and white balance. These are features that, when mastered, can make you look like a seasoned pro.
Tap to Focus: Get Your Priorities Straight
If you’re anything like me, you’ve probably taken a photograph where the background is as sharp as a tack, but your main subject looks like a blurry mess.
The solution? Tap to focus. When you’re lining up your shot with one hand, use the other to tap on your screen where your primary subject is. This simple action tells the smartphone camera, “Oi, this is what I want in focus!”
When you tap to focus, the camera not only adjusts the focus but also the brightness of your image. The camera’s software uses algorithms to figure out the optimal exposure based on the area you’ve tapped. This ensures that your subject isn’t too dark or washed out, giving you a well-balanced photo.
Exposure Compensation: Bright Idea!
Next up, let’s talk about a little slider that can have a big impact: exposure compensation. Sometimes, despite your best efforts, a photo can still look too dark or too blown out. This is where the exposure compensation slider comes in handy. Usually represented by a sun icon or something similar, this slider lets you manually adjust the brightness of your photo to your liking.
You’ll often find this feature by tapping on the screen after you’ve set your focus. A slider should appear, letting you adjust the exposure by sliding it up or down. It’s a small tweak that can bring out details you thought were lost or tone down areas that were overexposed.
White Balance: Get the Colour Just Right
Last but by no means least, we have the white balance slider. We’ve all had those moments where a photograph looks overly blue or strangely orange, which is usually due to the type of lighting you’re under. Indoor lighting can often cast a yellow or orange hue, whereas overcast conditions can make things look blueish.
Look for the white balance slider in your camera app settings or sometimes directly on the screen. Sliding it one way will make your photo cooler (bluer), and the other will make it warmer (more orange). Adjusting this can help your photos look more natural and as close to what the human eye sees.
Creative Smartphone Photography Tips: Easy Ways to Take Better Pictures With Your Mobile Device
In today’s fast-paced world, capturing that perfect shot shouldn’t require lugging around bulky photography equipment. With a smartphone in your pocket, you’re always armed with a capable camera.
In this section, we’ll delve into handy tips that will elevate your smartphone photography, from the rule of thirds to choosing the right camera app, and more. So let’s get snapping!
Rule of Thirds: Why and How to Use It?
You can’t talk about photography tips without mentioning the rule of thirds.
Remember the Grid we mentioned above… that’s what this is all about.

The engineer is on the left third in the shot above
This principle is an oldie but a goldie. Imagine your smartphone screen divided into nine equal squares by two equally spaced horizontal lines and two equally spaced vertical lines. The rule dictates that you should place the most critical elements of your shot along these lines, or at the intersections.
Why does this matter? Well, this composition technique can make your photos more balanced and engaging. Try putting your subject in one of the corners where the lines intersect. Your viewer’s eyes will naturally gravitate to these points, making your photo instantly more appealing. This technique is especially useful in landscape photography, where you can use the rule of thirds to position your horizon and distribute elements evenly in the frame.
Which Camera App Should You Use?
The camera app that comes with your smartphone is usually alright, it’s what I use on my Pixel phone.
There are tons of third-party camera apps that can do more. For instance, Lightroom Mobile provides comprehensive manual controls, such as adjusting ISO, shutter speed, and focus. This kind of control allows you to capture photos that are much more tailored to your vision.
Furthermore, some of these apps offer features like RAW capture, the Google Pixel stock camera does this, which gives you the highest quality image to work with during editing.
Ever tried getting detail back in an overexposed sky? With a RAW file, it’s often possible. But beware, the files are a lot larger and do need editing. So save it for “best”.
Portrait Photography vs. Landscape Photography
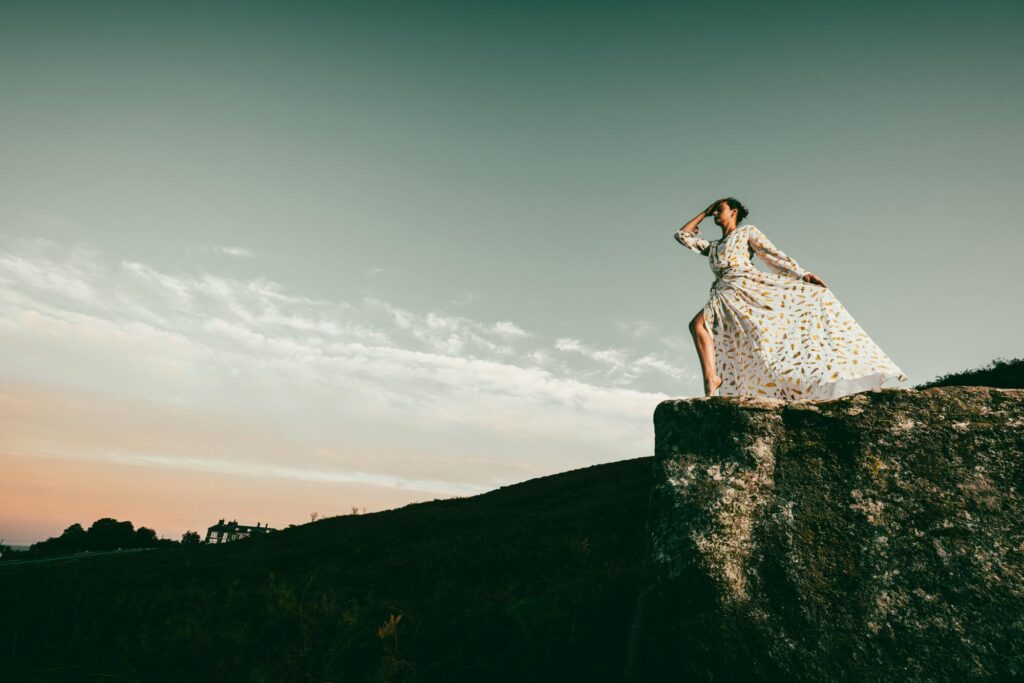
Portrait photography with smartphones has improved by leaps and bounds thanks to advancements like portrait mode. When enabled, this feature adds a simulated bokeh effect, putting your subject into sharp focus while giving the background a beautiful blur. This is particularly useful for, well, portraits or any shots where you want the subject to be the star of the show.

In this photo, the truck in the background is blurry, so the 2 people in the photo stand out.
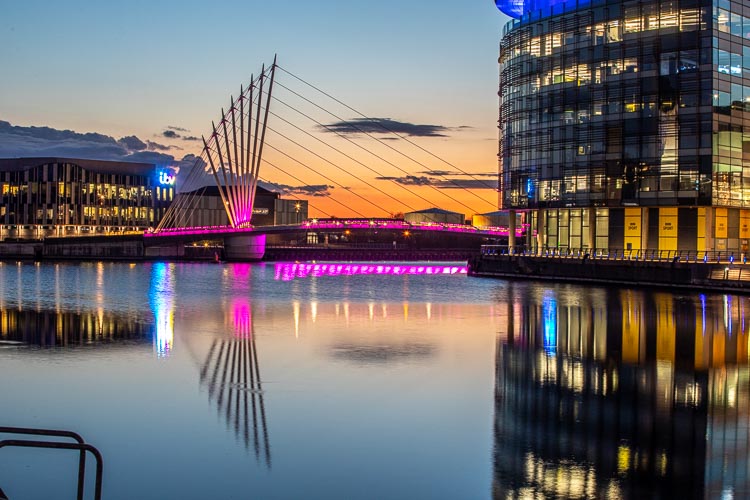
Landscape photography, on the other hand, usually aims for a broader depth of field. In simple terms, you’ll likely want as much of your scene in focus as possible—from the leaves in the foreground to the mountains in the background. Switching off features like portrait mode and selecting a smaller aperture (if your camera app allows for it) can help achieve this.

In this photo, everything is sharp, from the nearest nut and bolt, to the far end of the bridge
For landscape, just use the default settings – if you do have HDR as an option, switch it on. Most cameras have HDR on all the time and have got rid of the option altogether because it’s a no-brainer to use it
Phone Camera Features: What Do You Need?
Every year, smartphone manufacturers throw a plethora of new camera features at us. It’s easy to get caught up in the excitement and think you need the latest 108-megapixel sensor or the newest AI-driven feature.
However, let’s cut through the fluff. Features like High Dynamic Range (HDR) can genuinely make or break a photo by allowing you to capture more detail in both bright and dark areas. Features like optical zoom or a wide-angle lens can also add versatility to your smartphone photography. But let’s be honest—most of us can live without 100x zoom. Know what features are beneficial for the types of photos you commonly take, and don’t get swayed by the latest gimmicks
Here are some of the terms you’ll hear, a little summary and how important I think they are
- Megapixels (MP)
- What it does: Determines the resolution of your photos. A higher megapixel count allows for more detailed images.
- Importance: 7/10
- High Dynamic Range (HDR)
- What it does: Captures multiple photos at different exposures and combines them to create a balanced image with more detail in both bright and dark areas.
- Importance: 9/10
- Optical Zoom
- What it does: Uses the lens to magnify the subject without losing image quality.
- Importance: 7/10
- Digital Zoom
- What it does: Crops into the image to bring you closer to the subject but reduces image quality.
- Importance: 4/10
- Wide-Angle Lens
- What it does: Captures more of a scene in a single shot, useful for landscapes or group photos.
- Importance: 8/10
- Portrait Mode
- What it does: Blurs the background while keeping the subject in focus, creating a depth-of-field effect.
- Importance: 8/10
- Image Stabilisation
- What it does: Reduces camera shake to produce clearer shots.
- Importance: 8/10
- Burst Mode
- What it does: Takes a series of photos in quick succession, useful for capturing action shots.
- Importance: 6/10
- Night Mode
- What it does: Enhances low-light photography by taking a longer exposure shot without a flash.
- Importance: 7/10
- Manual Mode
- What it does: Allows you to adjust settings like ISO, shutter speed, and aperture manually.
- Importance: 5/10 (higher if you’re an advanced user)
- 4K Video
- What it does: Enables video recording in ultra-high-definition.
- Importance: 6/10
- Slow-Motion Video
- What it does: Records video at a high frame rate for playback in slow motion.
- Importance: 5/10
- Time-Lapse
- What it does: Captures video or images at a lower frame rate for fast playback, making long events appear much shorter.
- Importance: 5/10
- RAW Image Support
- What it does: Allows you to capture uncompressed images for more flexibility in post-production.
- Importance: 6/10 (higher for serious photographers)
- AI Scene Recognition
- What it does: Automatically adjusts settings based on what the camera perceives to be the subject matter.
- Importance: 5/10
- Selfie Camera
- What it does: Front-facing camera designed for self-portraits or video calls.
- Importance: 7/10 (higher if you take a lot of selfies or make video calls)
Remember, the best features for you depend on your own photography needs and how you like to shoot. It’s not about having every new bell and whistle; it’s about knowing which tools will genuinely help you take better photos. And if you want to delve deeper into the nuances of phone photography, workshops like those at www.yorkshirephotocourses.co.uk could be well worth your time.
Keeping Your Phone Steady: From Human Tripods to Actual Tripods
In days of yore, an unsteady hand might’ve contributed an “artistic” blur to your photos. But blurred shots are often just annoying, especially when capturing that perfect moment is crucial. A shaky hand becomes even more problematic in low-light conditions, where the camera shutter remains open longer to let in more light, making it more susceptible to blurriness.
The Human Tripod Method
The simplest way to reduce camera shake is to use both hands to hold your phone and tuck your elbows into your sides—essentially making yourself into a ‘human tripod’. It might look a bit awkward, but your photos will thank you.
Using Your Environment
Now, if you’re outdoors and in need of extra stability, don’t underestimate the use of a good wall. Leaning against a wall can give you that extra bit of steadiness to make a world of difference in your shots. Similarly, tables aren’t just for pints and pies; they make excellent makeshift tripods too. You can lean your phone against a stable object like a glass or a mug to ensure it stays still.
Cheap and Cheerful Tripod Solutions
Let’s say you’re looking to go hands-free for capturing long-exposure shots, group photos, videos, or even video calls. A physical tripod can be your best mate in these situations. Good news is, you don’t have to break the bank. Many tripods designed for mobile phones are not only affordable but also compact enough to fit in your bag without causing a fuss.
If you’ve got a flash tripod lying about, a simple phone holder can be screwed onto it, providing a versatile and cost-effective solution. Great for photos, even better for videos, and a godsend for video calls.
The Proper Tripods
But for those who want to invest a little more into their smartphone photography, specially designed mobile tripods offer features like extendable legs, ball heads for multi-angle shots, and even Bluetooth remotes for hands-free shooting.
Keeping your phone steady isn’t about expensive gadgets; it’s about a bit of common sense and making the best use of what you’ve got around you. And if you’re keen to elevate your phone photography skills, consider taking a workshop at www.yorkshirephotocourses.co.uk, where you’ll find plenty of tips and hands-on advice to help you out. There you have it—no more excuses for shaky shots!
Understanding Low Light and High Dynamic Range Settings
Low-light photography is often considered the Achilles’ heel of smartphone cameras, but that’s changing. Newer models offer significantly improved low-light capabilities. The key is to use a slow shutter speed to allow more light to hit the sensor. But beware—this also makes your photos more susceptible to the dreaded camera shake. This is where keeping your phone steady becomes crucial.
On the other end of the spectrum, High Dynamic Range (HDR) is a must-have feature for those tricky scenes with varying light conditions. HDR takes multiple photos at different exposures and combines them into one optimally exposed image. This is particularly useful for scenes with both dark and bright areas, such as a landscape with a bright sky and shaded foreground.
Leading Lines: What Are They and How to Use Them?
Leading lines can take a mundane photo and turn it into something captivating. These are lines within the composition that guide the eye towards the main subject. Roads, fences, and rivers are common examples. Use these lines to lead your viewer on a journey through your image, letting their eyes naturally fall upon the main subject.
Here, the metal fence leads the eye to the workers in orange

It’s not just straight lines that can be used for this technique; curves and zigzags can also add a dynamic element. The next time you’re out and about, take a moment to look for natural leading lines in your environment—they might just be the missing ingredient in your smartphone photography.
Smartphone Accessories for the Serious Photographer
If you’re keen to go beyond casual snaps, you might want to consider investing in some smartphone photography accessories.
Things like external lenses can give you a fresh perspective, whether it’s a macro lens for up-close details or a wide-angle lens for capturing sprawling landscapes. Tripods, remote shutters, and even smartphone gimbals can all add value and versatility to your mobile photography setup.
Here are a few things you can buy… and how useful they are
Lens Attachments
What They Do: These clip-on or screw-on lenses can expand the capabilities of your phone’s built-in lens, offering options for wide-angle, macro, or telephoto photography.
Ease of Use: Simply clip on or screw into the existing lens. It takes just a couple of seconds.
Rating: 9/10 – These can dramatically improve the kind of photos you can take, especially if your phone’s built-in camera lacks these features.
Tripods and Monopods
What They Do: They provide stability, which is essential for long-exposure and low-light photography. Monopods offer some stability while still allowing mobility.
Ease of Use: Generally straightforward. Most have adjustable legs and some even come with a Bluetooth remote for hands-free shooting.
Rating: 8/10 – While not always necessary, they can be indispensable for certain kinds of shots. If you do video too, then get one
Ring Lights
What They Do: These provide even lighting, particularly useful for portrait photography and selfies.
Ease of Use: Clip it onto your phone or stand it up on its own. Most are USB-powered.
Rating: 5/10 – Good for portraits but not universally useful. I’d just stand your subject near a nice window and get light from that
Smartphone Gimbals
What They Do: They stabilize your smartphone, reducing shake in video recording.
Ease of Use: It takes a bit to get used to the controls, but once you do, it’s straightforward.
Rating: 6/10 – If you’re into videography, this could be a game-changer. For photography, can be handy as they do automatically level the shot for you.
External Microphones
What They Do: Improve audio quality for videos, handy for interviews or vlogging.
Ease of Use: Plug it in, and you’re good to go. They do a great job – even around the £25 price point work well.
Rating: 3/10 – Crucial for video but not for photography.
ND Filters
What They Do: Neutral Density filters help to control exposure, allowing for more flexibility in varying lighting conditions. On a very bright day you may want to darken things down, but the main use is getting long exposures – think about those waterfall photos with milky looking smooth water… that.
Ease of Use: Clip-on options are available, making them easy to attach.
Rating: 5/10 – Useful for professionals but might be overkill for the average user.
Remote Shutter Release
What They Do: Allows you to take photos without touching your phone, reducing the risk of shake. Or selfies where you are not holding the camera – perfect
Ease of Use: Connect via Bluetooth, and click.
Rating: 7/10 – Handy but not always necessary.
Editing Your Photos: What Apps Work Best?
There are so many… here are a few, ranging from the simple (Instagram) to the more geeky (Darkroom)
Instagram (In-built Editor)
Cost:
Free
Top 3 Features:
- Filters – Simple one-click solutions for quick edits.
- Brightness/Contrast adjustments – Basic but effective for small tweaks.
- Crop – Handy for cutting out unwanted clutter from the frame.
Platform:
Android, iPhone
Rating:
4/10 – Good for absolute beginners but lacks any sort of depth.
VSCO
Cost:
Free, Premium features available
Top 3 Features:
- Filters – A wide range that can mimic film textures and tones.
- Exposure adjustments – More nuanced control than Instagram.
- White Balance – Handy for getting more accurate colours.
Platform:
Android, iPhone
Rating:
6/10 – Versatile, but can be limiting for more experienced users.
Pixlr
Cost:
Free, In-app purchases
Top 3 Features:
- Layer editing – Allows for more complex edits.
- Local adjustments – Pinpoint your edits to specific areas.
- Wide array of filters – For those who love to experiment.
Platform:
Android, iPhone
Rating:
7/10 – Comes with a bit of a learning curve but offers robust features.
SnapSeed
Cost:
Free
Top 3 Features:
- Selective adjustments – Control edits to specific points in your photo.
- RAW editing – Essential for high-quality post-processing.
- Curves – Fine-tune contrast and colour balance with precision.
Platform:
Android, iPhone
Rating:
8/10 – Comprehensive and user-friendly, great for serious smartphone photographers.
Adobe Lightroom Mobile
Cost:
Free, Premium features
Top 3 Features:
- RAW editing – A must-have for editing high-resolution photos.
- Syncing across devices – For those working on multiple platforms.
- Advanced adjustment sliders – Like having a mini Photoshop in your pocket.
Platform:
Android, iPhone
Rating:
9/10 – An all-rounder that comes closest to desktop editing software.
Photoshop Express
Cost:
Free, In-app purchases
Top 3 Features:
- Basic photo editing – Good for quick fixes and touch-ups.
- Collage-making – Useful for creating photo grids for social media.
- Quick fixes like blemish removal – Ideal for portraits.
Platform:
Android, iPhone
Rating:
7/10 – A watered-down Photoshop but handy for quick edits.
Afterlight 2
Cost:
£2.99 one-time purchase
Top 3 Features:
- Filters – Bespoke options that bring a unique look to your shots.
- Textures – Adds layers of complexity to simple shots.
- Advanced editing tools – For those who want to go the extra mile.
Platform:
iPhone
Rating:
8/10 – Exclusive to iPhone but packs a punch for its price.
Darkroom
Cost:
Free, Premium features
Top 3 Features:
- RAW editing – Elevates your iPhone photography to near-professional levels.
- Custom filters – Create and save your own filters for consistent styling.
- Histogram – Great for technical folks who want to see their exposure levels.
Platform:
iPhone
Rating:
8/10 – Not for the faint-hearted but perfect for those who know their way around a photo editor.
How to Take Amazing Smartphone Photos: Final Thoughts
Smartphone photography offers the convenience of capturing high-quality photos without the bulk of traditional photography gear. With the right knowledge and a bit of practice, you can take pictures that are indistinguishable from those taken with more professional equipment. So go ahead, unlock your smartphone’s potential and capture the world around you in all its glory.
Frequently Asked Questions (FAQs): Your One-Stop Guide to Mobile Photography Mastery
You’ve probably got some questions left, and we’ve got the answers. Our FAQ section aims to cover every nook and cranny of smartphone photography.
Q: What are some basic photography tips for taking good photos with a phone?
A: When it comes to basic phone photography, consider the rule of thirds, keep your phone steady, and use leading lines to guide the viewer’s eye. These are tried and true tips that even a professional photographer would recommend for taking stunning photos.
Q: What are some essential mobile photography tips and tricks?
A: Beyond the basics, you can use your phone’s HDR setting for balanced exposure, employ portrait mode for depth, and use smartphone photography accessories like a tripod to help you take better photos. These are easy tips to help you take your mobile photos to the next level.
Q: What’s the best camera for phone photography?
A: The best camera is the one you have with you. The latest iPhones and top-tier Androids have excellent camera capabilities, making them ideal for smartphone photography. However, knowing how to harness your phone’s potential is more important than the phone itself.
Google’s Pixel range have some of the best reviews – I’ve used them for years and love the results.
Q: Can you do product or travel photography with a smartphone?
A: Absolutely! With the right techniques and possibly some extra accessories, you can take great product or travel photos. The key is to learn how to take advantage of your smartphone’s features and improve your mobile photography skills.
Q: How many photos should I take?
A: Take as many photos as you can. The more shots you have, the better the chances of getting the photos you want. It’s better to have too many and delete the extras than to miss out on the perfect shot.
Q: Can I use my smartphone for photography in a professional setting?
A: While a smartphone may not replace a DSLR in a professional setup, it can certainly hold its own in specific scenarios. The phrase “good photos with a phone” is no longer an oxymoron, thanks to advancements in mobile camera technology.
Q: How can I make my photos look professional?
A: To make your photos look more professional, consider using a mobile app that allows for manual adjustments like exposure, white balance, and focus. Knowing the photography basics and applying tips and tricks can significantly improve your smartphone photos.
Q: What kind of smartphone is best for photography?
A: While the iPhone is highly popular for its camera capabilities, several Android phones also offer excellent photography features. The best kind of smartphone for you depends on your specific photography needs and what you find simple and effective.
Q: Do I need to take a photography course to improve?
A: While taking an online photography course could be beneficial, it’s not mandatory. There are many free photography resources available to help you. Remember, photography has become more accessible, and improving your smartphone photos can often be achieved through practice and experimentation.
Q: Can I take abstract or artistic photos with my phone?
A: Absolutely! Abstract photography, in particular, can be a fun and experimental way to explore your smartphone’s capabilities. With the right techniques, you can create art right from your mobile camera.
Q: Is iPhone photography different from using an Android phone?
A: While both types of phones are capable of producing high-quality photos, they do have their own set of features and settings. For example, iPhones are often praised for their colour accuracy, while Android phones may offer more manual settings. Understanding the specifics of your phone can greatly enhance your smartphone photography.
Q: Can you actually learn photography from a phone?
A: Absolutely, you can learn many photography basics using just your smartphone. In fact, phone photography is a great stepping stone to more advanced techniques and equipment. There are even dedicated workshops for this, like the ones you can find at www.yorkshirephotocourses.co.uk.
Q: Are there any smartphone photography accessories worth buying?
A: Accessories like tripods, lens attachments, and even portable lighting can significantly improve your mobile photography. Think of these as tools to help you take photos that are a cut above the rest.
Q: How can I keep my smartphone steady for better photos?
A: Keeping your phone steady is crucial for clear shots. You can brace yourself against a wall, use both hands or even use a smartphone mount to minimise shake. Remember, a still phone leads to sharp photos.
Q: How can I take better photos of people with my smartphone?
A: When taking pictures of friends or family, good lighting and proper framing are your best friends. Features like portrait mode can help blur the background and make your subject pop.
Q: What’s the best way to take photos in low light?
A: Many smartphones come with a ‘Night Mode’ specifically designed for low-light conditions. Also, using a tripod can help in capturing clearer shots when the lighting isn’t ideal.
Q: Can I use my smartphone for action shots?
A: You sure can. Use your phone’s ‘burst mode’ to take a series of photos quickly. This improves the likelihood of capturing that perfect, high-action moment.
Q: What’s the difference between digital and optical zoom on a smartphone?
A: Optical zoom uses the lens to bring you closer to the subject without losing quality, while digital zoom crops into the image, leading to a loss in quality. If your phone has optical zoom, it’s generally the better option.
Q: Can you do macro photography with a smartphone?
A: Some smartphones come with a dedicated macro lens, but even without one, you can get fairly close to your subject for a detailed shot. There are also macro lens attachments available for most smartphones.
Q: How can I improve my mobile photography for social media?
A: Composition and lighting are key. Also, many social media platforms have their own set of preferred image dimensions. Knowing these can help you frame your shots better. Simple editing using in-app tools can also elevate your photos from good to great.
Related Posts
- Photographer Meets Celebrity Look Alikes in Leeds

Coast – Trinity Leeds
Why Industry Needs Regular Professional Photos
Editing Yorkshire Landscape Photos in Lightroom
Exploring the Charm of Cambridge: Sepia Photos of Cambridge
Mavic Air Drones for Photography
The Power of Symmetry: Exploring Balance and Harmony in Photography
Lightroom Rescue in under 10 minutes…