Why taking a drone on a landscape trip makes perfect sense?

If you are a dedicated landscape photographer, you will know that the only photos worth taking are at sunrise and sunset because of the beautiful light we get.
Well, that’s not strictly true, but in general, if you do a full day out with a camera, you will tend to be drawn to those photos to edit first because the light is better.
Sunsets are King, what about the rest of the day?
It’s just a simple fact that a nice pink sky, low light with long shadows, and very nice warm side-lit trees and walls make for a nicer photograph than the sun high above your head making everything the same brightness and the shadows being short. Low light sunsets are just wonderful, and you only get maybe an hour of sunset and an hour of sunrise in a day, so what you have in the middle is a long period where you can photograph as much as you like, but it’s never going to be quite as good as the sunset photographs.
How about waterfalls?
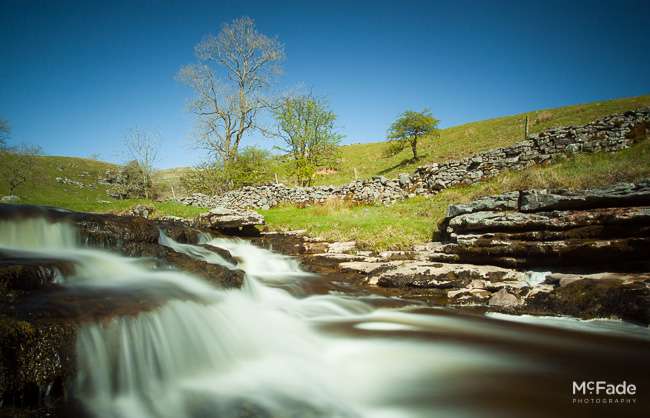
So what this requires is planning for your day. I would strongly suggest that finding waterfalls which are under trees is a fantastic way to spend these bright hours because they will be shaded and you probably don’t really need or will benefit from sunset light. Instead, you can photograph your waterfalls in any conditions, especially if you like the milky look and have some neutral density filters, but unless you are in Swaledale or Wharfdale or Wensleydale, you may not have enough waterfalls to occupy you for the entire day.
Drone sensors are not as good as your DSLR

This is where I think your drone comes in because anybody who’s flown a drone knows that the sensors on these things are nowhere near as good as your actual camera. They are a little bit like using a DSLR from the noughties like a 10D or something like that in that once they get above 400 ISO or you have a very flat lit day, they tend to be difficult to get any real detail or edit out of.
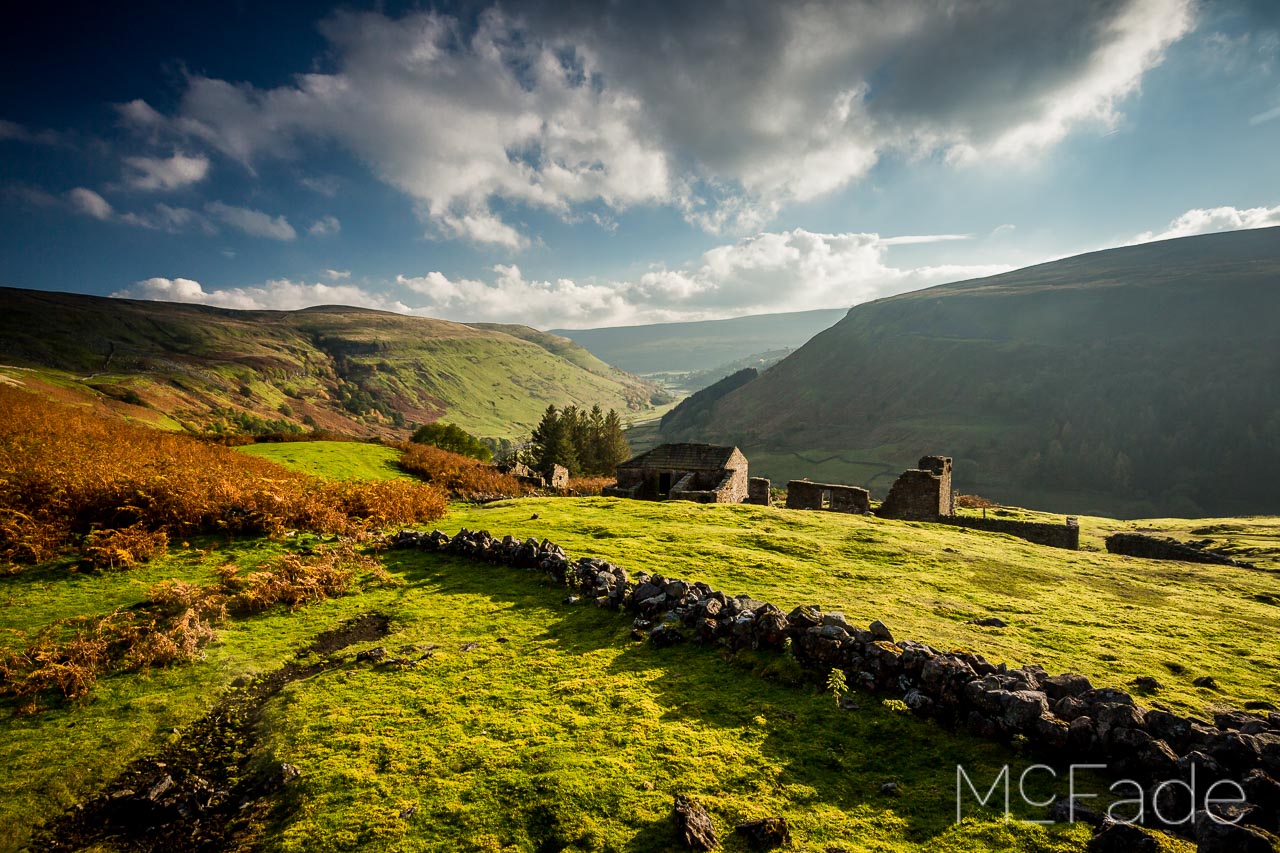
So a flat grey day with a drone photo is a difficult thing to get good results from, but if you’re out and about doing landscapes and it’s a bright sunny day during the daytime, get your drone out and fly around and get some great photos of this. It could be anything from just hovering above a waterfall from a completely impossible angle or it could be going up 100 feet to get a nice impossible view of your valley or you could zoom over to a barn and get a nice shot with a barn in the foreground.
Your 400-foot tall tripod

What I would strongly suggest you do is think of your drone as another camera but this time with a 400 feet tall tripod. You can take it anywhere you want as long as you can see it, it is legal to fly, especially in the countryside.
You definitely need to check the local bylaws so you’re not flying where the locals have a sight of Peregrine Falcons flying, for instance, so it is well worth checking all that sort of thing before you set off, but once you set off and you know that drone is legal, make the most of it.
Recce with your drone too
One thing I do use my drone for is if there is a hidden waterfall, sometimes it’s worth having a little flight over to it to check that there’s enough water coming down the waterfall because sometimes you can walk quite a way through some woods and when you get to the waterfall, it’s dry, so that’s a useful thing to know.
Try video whilst you’re at it
Another thing with your drone is creating a bit of video, of course. This is one of those skills which is great to do in the field but can be very time-consuming when you get home. Obviously, when you get home, you have to edit the thing; otherwise, it will be a very boring thing to watch, so that is another learning curve.
DNG files and Bracketing with your drone

But most drones I’ve used will allow RAW files which come in the form of a DNG. You can bracket usually which means it can take dark, medium, and light photos. My drone has 5 brackets or 3 brackets so you get like minus 1, minus 2, plus 1, plus 2, and 0 EV. Sometimes if you have a contrasting scene, it is well worth doing this because as I said earlier, your RAW files are nowhere near as powerful as the ones you get from your SLR, so if you try to recover the shadows or highlights from the middle photo, you’re on a hiding to nothing. You’re far better off capturing that detail in a bracketed shot.
Editing RAW files is an interesting one because they are pretty much the same as your normal camera but just not quite as powerful. One tool I would recommend if you are using a DJI drone is DXO photo lab. I’ve got version 7 at the moment, and this does have a profile for the drones I use. What that means is somebody has taken the drone and calibrated it so it will get rid of any vignetting and distortion and will also correct the lens softness so it will sharpen it perfectly.
DXO also has the best in class of noise reduction so this can really help make the most of your RAW files. Not such a big thing on a bright sunny day because they will look crisp and contrasty anyway, but if you’ve been out when it’s a little bit overcast or especially at sunset, it’s well worth giving them a go through DxO.
Create a BETTER DNG with DXO

DxO can output another DNG file so effectively it takes in a RAW file, enhances it, and spits out a RAW file at the far end. You can then use your usual workflow in Photoshop or Lightroom to make the most of the file. You will notice that you don’t need to sharpen or add any noise reduction, and you will find yourself just playing with color contrast and maybe a little bit of creative stuff.
Get more out of your days in the countryside
So throughout the day if you travel around an area, what I would suggest is get the photos you can get with your camera and have your drone with you and then pop the drone up in a safe area where there’s no people around and there’s no buildings and just get some shots of the area as you fly around. What this does is it gives you far more bang for your buck and a lot more output from your photography day out. It’s also worth when you move around flipping over to video and just videoing what you do.
Don’t be a jerk
I would strongly suggest that if you are recording video you need to avoid jerky movements. So that means if you are turning the drone don’t turn it quickly, turn it very very steadily or better still fly in a straight line then stop and change direction and fly in a straight line again. What this will do it will give you some nice smooth footage which you can use without any jerks. The worst thing about drone video is when you think you’ve got a great clip but when you watch it back it’s all very jerky and unsmooth especially if you speed the footage up a little bit it’s so obvious and it just looks horrendous.
Think of it as an addition to your days out
So there you go that’s my philosophy on taking drones out. Get all your normal photographs with your normal kit as normal but during the day when it’s bright and sunny and you’re struggling to get great photos it’s a perfect opportunity to send your drone up and get some excellent high video and raw files to process.
Related Posts

Shoot with Rocco Salah in Meanwood Park
Plating Perfection: Must-Have Photos for Restaurants to Whet Appetites Online
2015 Photography Review 8 – August
LIGHTROOM tutorial – Landscape – Swaledale Waterfall
Complete Fire Solutions – Team Shoot
Tetley Brewery – The End of an Era
15 Photos of Kingsdale
Save Preston Bus Station!