Macro Photography Tips for Beginners: tips and techniques
Right then, let’s get into the nitty-gritty of macro photography, or as I like to call it, the art of making the minuscule look monumental. I’ve always been fascinated by the little worlds that exist right under our noses. Take, for example, a tiny spider I discovered in my living room. Capturing its intricate details felt like unveiling a secret universe. That’s the essence of macro photography – bringing to life the unseen and overlooked aspects of our world.
Macro photography isn’t just about getting close to your subject; it’s about seeing life through a magnifying glass. It’s about patience, precision, and a bit of creativity thrown into the mix. Whether it’s the delicate veins of a leaf, the dew on a spider’s web, or the complex eyes of an insect, macro photography allows us to appreciate the beauty in the details.
Now, diving into macro photography might seem daunting at first, but don’t worry. I’m here to guide you through every step of the process, from choosing the right equipment to mastering the perfect shot. We’ll explore the tools, techniques, and tips that will transform your shots from ordinary to extraordinary.
And it’s not just about having the fanciest gear or the most expensive camera. With a bit of know-how and a creative mindset, you can capture stunning macro photos that’ll make people look twice.
Understanding Creative Macro Photography: Take Great Macros!

Before we dive deeper, let’s get a clear picture of what macro photography actually is. In the simplest terms, it’s the art of making small objects look larger than life. It’s about capturing details that are often invisible to the naked eye, creating a window into a world teeming with life and intricacy.
Macro photography is more than just close-up photography. It’s a technical and creative field that demands a good understanding of photography basics, along with some specialized equipment. But don’t let that intimidate you. Once you grasp the basics, you’re well on your way to capturing the world in breathtaking detail.
What is Macro Photography and Macro Photographs
So, what exactly is macro photography? Well, it’s all about magnification, about bringing the small and intricate details of life into full view. The term itself comes from the Greek word “makros,” meaning large or long. But in the world of photography, it’s all about making the tiny appear titanic.
Whether it’s the intricate patterns on a butterfly’s wings or the dewdrops clinging to a spider web, macro photography reveals the beauty and complexity of subjects that are often overlooked. It’s a way to showcase the extraordinary in the ordinary, transforming mundane subjects into works of art. And that’s the magic of macro photography – it’s a passport to a hidden world, right there in your living room, garden, or the local park.
Comparing Macro to Micro: Distinguishing the Details
Now, you might be wondering how macro photography differs from micro photography. It’s all about the scale. Macro photography typically deals with a magnification ratio of 1:1, meaning the subject is captured as the same size as it is in real life. This is where equipment like extension tubes come into play, allowing us to get closer and capture those stunning macro photos with incredible detail.
On the other hand, micro photography goes even further, delving into the realm of magnifications beyond life-size. It’s often used in scientific contexts, where capturing the minutest details is crucial. But for most of us enthusiasts, macro photography offers the perfect balance, enabling us to explore the beauty of life at a magnification that turns the ordinary into the extraordinary.
Equip Yourself for Macro Mastery

Getting started in macro photography doesn’t require an arsenal of gear, but a few key pieces can make all the difference. Your journey to capturing the intricate beauty of life in stunning detail begins with the right equipment. From the choice of camera to the selection of lenses and accessories, each component plays a crucial role in macro photography. Let’s explore how you can equip yourself for macro mastery, ensuring every shot is as captivating as the life you’re aiming to capture.
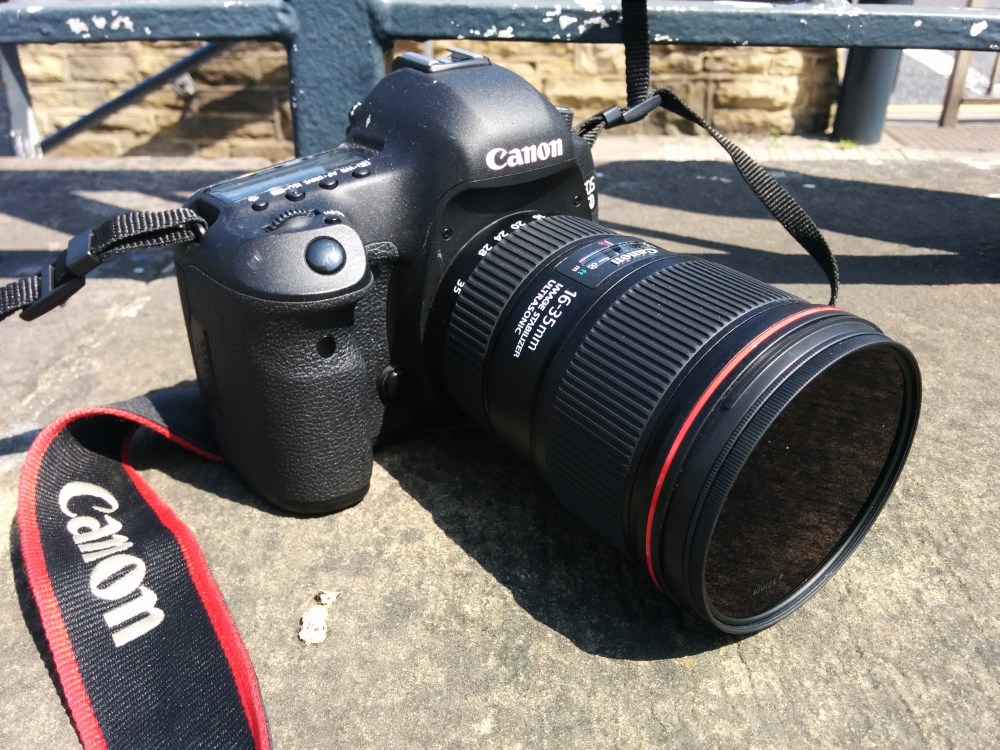
Camera Selection: DSLR vs Mirrorless for Macro Work
Choosing the right camera is crucial for macro photography, and I’ve had my fair share of experiences with both DSLRs and mirrorless cameras. While pressing the shutter on a DSLR feels familiar and reassuring, the truth is, the focus on a mirrorless camera works better for macro work – I just found that the AF on the R5 can find eyes faster.
But most macro people don’t use Auto Focus I hear – preferring to fix the focus and then move their bodies back and forward to get focus.
So let’s not dismiss DSLRs; they’re more than capable of capturing close-up photos that can leave you breathless and if you’re not using AF, you’re in!
Canon and Nikon have been at the forefront, offering both DSLRs and mirrorless cameras that are fantastic for macro photography. Whether it’s the real-time feedback from a mirrorless camera’s rear LCD or the optical delight of a DSLR’s viewfinder, both genres of photography offer pathways to capturing award-winning macro shots. But yes, if you forced me to choose, I’d lean towards a mirrorless for its edge in composing and capturing the minutiae of life.
Choosing a Macro Photography Lens for Ultimate Clarity
When it comes to macro photography, the lens is where the magic happens. Choosing the right macro lens can be the difference between a good photo and a breathtaking piece of art. Budget is a key consideration here, so let’s talk about some of the best options that won’t break the bank but will still allow you to capture life with stunning clarity.
If you’re shooting with a Canon EOS, you’re in luck. Canon offers a range of macro lenses that are perfect for capturing life’s tiny details. The dedicated macro lens in their lineup is a testament to their commitment to quality and clarity in macro photography. But Canon isn’t the only player in the game. Nikon, Sony, and Sigma also offer incredible macro lenses that cater to a variety of budgets and needs.
Here’s a quick look at some of the top macro lenses out there:
| Brand | Lens Model | Description |
|---|---|---|
| Canon | EF 100mm f/2.8L Macro IS USM | High-performance L-series lens with image stabilization, excellent for detailed macro photography. Price: around £800. |
| Nikon | AF-S Micro NIKKOR 105mm f/2.8G IF-ED VR | Features Vibration Reduction (VR) for high detail and sharpness, perfect for extreme close-ups. Price: around £800. |
| Sony | FE 90mm f/2.8 Macro G OSS | Mid-telephoto macro lens with Optical SteadyShot (OSS), delivering sharp images with beautiful bokeh. Price: around £1,000. |
| Olympus | M.Zuiko Digital ED 60mm f/2.8 Macro | Ideal for nature and detailed shots, this lens offers a 1:1 magnification and a fast aperture. Price: around £400. |
| Panasonic | Lumix G Macro 30mm f/2.8 ASPH | Features optical image stabilization and a compact design, great for close-up and macro shots. Price: around £300. |
| Fujifilm | XF 80mm f/2.8 R LM OIS WR Macro | Weather-resistant design with a high-quality build, offers 1:1 magnification and image stabilization. Price: around £1,200. |
| Sigma | 105mm f/2.8 EX DG OS HSM Macro | Available for multiple mounts, this lens provides superb stabilization and clarity for serious macro photography. Price: around £500. |
| Tamron | SP 90mm f/2.8 Di Macro 1:1 VC USD | Features full 1:1 magnification and Vibration Compensation (VC) for sharp and stable macro shots. Price: around £650. |
| Zeiss | Touit 50mm f/2.8M | Designed for APS-C sensors, this lens offers exceptional detail and contrast for macro and portrait photography. Price: around £800. |
| Laowa | 100mm f/2.8 2X Ultra Macro APO | Unique in its ability to achieve 2:1 magnification without extensions, providing greater detail and creative options. Price: around £450. |
| Leica | APO-Macro-Summarit-S 120mm f/2.5 | High-end macro lens with superior build quality and image performance, ideal for professional macro photography. Price: around £5,500. |
| Pentax | HD DA 35mm f/2.8 Macro Limited | Provides sharp images with a compact design, excellent for handheld macro photography. Price: around £400. |
| Samyang | 100mm f/2.8 ED UMC Macro | Manual focus lens that offers 1:1 magnification and high optical quality at an affordable price. Price: around £300. |
| Irix | 150mm f/2.8 Macro 1:1 Dragonfly | Built for extreme detail, this lens is sealed against dust and water, making it suitable for outdoor macro photography. Price: around £500. |
| Venus Optics | Laowa 65mm f/2.8 2x Ultra Macro APO | Designed for APS-C cameras, this lens achieves up to 2x magnification for greater detail in macro photography. Price: around £400. |
Remember, the best lens for you depends on your specific needs and your camera body. Whether you’re after the flexibility of a zoom lens or the precision of a fixed focal length, there’s a macro lens out there that’s perfect for your journey into the world of macro photography.
Extension Tubes and Their Role in Macro Photography
For those itching to try macro photography without splurging on a dedicated macro lens, extension tubes are a godsend. These nifty little devices work by increasing the distance between your camera’s lens and sensor, magnifying your subject without compromising on image quality. It’s an affordable option that can produce excellent results.
However, using extension tubes can be a bit tricky at first. They require a bit of patience and practice, especially when it comes to focusing manually. But once you get the hang of it, you’ll be rewarded with stunning macro photos that bring the intricate details of life into sharp relief. It’s all about experimenting and finding what works best for you.
Supporting Gear for Sharp Images

Aside from your camera and lens, a few key pieces of supporting gear can help you capture sharp, stunning macro photos. A stable tripod is great, especially when dealing with narrow apertures and slow shutter speeds. Additionally, a focusing rail can help with precise adjustments, ensuring your subject is perfectly in focus. With the right setup, you’re well on your way to capturing the tiny wonders of the world in breathtaking detail.
The Importance of a Stable Tripod
Let’s talk about tripods. In the world of macro photography, a good, stable tripod is worth its weight in gold. I personally swear by my Manfrotto 055 XPRO 3. It’s sturdy, reliable, and flexible enough to handle the peculiar positions I often find myself in when chasing the perfect shot. A stable tripod is crucial for dealing with the narrow apertures and slow shutter speeds typical in macro photography.
Using a tripod allows you to keep your camera steady, eliminating any unwanted movement that could blur your photo. It also frees up your hands, giving you the flexibility to adjust lighting, tweak your subject, or make fine adjustments with a focusing rail. Remember, capturing macro photos often requires taking multiple shots at different focal points, and a stable tripod is indispensable for this process.
Utilising a Focusing Rail for Precision

Right, let’s get into the nitty-gritty of getting those sharp shots, especially when you’re working in the world of macro. A macro focusing rail, it’s a brilliant bit of kit that slots right onto your tripod. It lets you adjust your camera’s position with the precision of a surgeon, moving it back and forth to nail that focus point spot on. It’s a game changer when you’re trying to capture the intricate details of something as tiny as a spider in your living room.

I picked up my Manfrotto focusing rail for a steal at £25 second-hand. Keep your eyes peeled for these bargains. It doesn’t have to break the bank, and it makes a world of difference. Trust me, when you’re trying to capture something as minuscule and marvellous as a spider weaving its web, that precision is worth its weight in gold.
Macro Technique – Crafting the Perfect Shot

Now, onto the macro technique. Armed with a dedicated macro lens, I set out to capture the tiny world that exists right under our noses – in my living room, with John. It’s all about patience and practice. One of the best macro photography tips I can give you is to start with subjects that don’t scurry away – like the tiny spider I found in my living room. It’s a fantastic way to hone your skills without the added pressure of a moving target. John sat for 5 minutes in one place, then upped and walked over his dandelion clock to another!
The Ladybird on the other hand was like a sprinter, running around hit branch!
The Basics of Macro Photography Settings
When delving into macro, you’ll need to tweak your settings a bit. Shutter speeds depend if you’re on a tripod or hand holding, either allowing you to let in enough light without blowing out the delicate details of your subject – so if you’re hand holding, you may be at 1/200th, on a tripod, maybe 1/2 second? All depends on the setup and light. It’s a bit of a balancing act, especially when you’re trying not to disturb a tiny creature like a spider with your movements.
Embracing Aperture Priority for Depth of Field Control
Depth of field is always a bit of a tricky customer up close. By using aperture priority mode, I can control how much of my tiny spider friend is in focus. Even at F11, the depth of field is narrow, so it’s crucial to decide what part of your subject you want to highlight. For me, it’s those incredible spidery eyes – but it’s really down to what’s facing you, if they’re looking away, you get their “rear end”!
Choosing the right spot to focus on is crucial, as even a slight miss can turn a potentially stunning shot into a missed opportunity. It’s a bit like threading a needle, really, but when you get it right, the results are absolutely worth it.
Remember, it’s not just about the technical bits. It’s also about enjoying the process, experimenting, and sometimes, letting those happy accidents lead to something truly special. Like finding beauty in the tiny world of a spider’s life, all within the comfort of your living room.
Advanced Composition Techniques for Macro Photography

Using a 100mm macro lens, I’ve discovered it offers just the right blend of distance and detail for shots like the one of my tiny spider guest. It allows me to keep a comfortable distance so as not to spook my subject while still capturing all the intricate details of its world.
Using Backgrounds Creatively in Macro Shots
Backgrounds can make or break your macro shots. In my spider’s portrait, I opted for a simple dark room – though some people use a coloured card background to spice things up. It’s part of the art, really, selecting a backdrop that complements your subject without overwhelming it.
Sometimes, the simplest solutions, like a sheet of coloured paper, can transform a good photo into a great one by isolating your subject and eliminating distractions. It’s all about making your star, in this case, a tiny spider, truly shine.
The Effect of Focal Length in Composing Your Shot
Choosing the right macro lenses and understanding focal lengths are crucial. With a 180mm lens, I can afford to stand back a bit, giving my spider some space. On the other hand, a 60mm lens demands I get up close and personal, which can be a bit of a challenge when trying not to disturb my subject.
Each focal length has its charm, offering a unique perspective on the world of inanimate objects and tiny critters alike. It’s about finding that sweet spot where you can capture the essence of your subject while maintaining the intimacy of the moment.
Macro Photography Lighting Unveiled

Lighting is another key in macro photography, affecting everything from mood to detail. Through years of tinkering, I’ve gathered a handful of tips and techniques that have served me well, especially in lighting my tiny spider without washing out its intricate patterns.
Whether it’s the soft glow of natural light or the controlled brilliance of artificial setups, understanding and manipulating light can elevate your macro shots from good to breathtaking.
Natural Light vs. Artificial Light in Macro Photography
In my adventures with macro photographs, I’ve learned to work with both natural and artificial light. A good camera and lens paired with the right lighting can make all the difference. For instance, ring lights and LED light panels can illuminate a spider in ways sunlight simply can’t, giving you control over shadows and highlights. And let’s not forget the magic of a macro ring for that even, flattering light right where you need it.
Harnessing the Natural Light for Soft Illumination
Natural light has a softness that’s hard to replicate. Finding the best angle to catch the ambient light can turn a simple shot of a spider into something extraordinary. Sometimes, though, you might find yourself becoming part of the scene, casting shadows where you least want them.
Using a reflector to bounce light back onto your subject can mitigate this, gently filling in those shadows without losing the natural look. It’s a bit easier to manage than Flash but comes with its own set of challenges, like the unpredictable British weather.
But remember, half the fun is in the experiment. Each shot teaches you something new, especially about playing with light and shadows in the tiny stages of macro and close-up photography.
Macro Photography Lighting Equipment for Consistent Results
For consistent lighting, nothing beats a good macro ring. It fits snugly on the lens, providing an all-around glow that’s just perfect for highlighting the details in a spider’s web. It’s a traditional choice, but for a good reason.
Then there’s the off-camera flash, like the GODOX AD200. Holding the flash in one hand and the camera in the other allows you to play with angles in a way that’s just not possible with fixed lighting. It’s a bit of a trial-and-error approach, coordinating your movements, but the results can be stunning.
And for those times when you need your hands-free, a light stand, possibly outfitted with a diffuser, can be a lifesaver. It lets you position your light source precisely, freeing you up to focus on capturing those tiny marvels, like my resilient little spider, in the best light possible.
Mastering Focus for Stellar Macro Images

Now, let’s get down to focus. It’s like trying to thread a needle at a rock concert when you’re first starting, especially with those tiny subjects. But once you’ve got the hang of it, the clarity in your macro shots will make your heart sing. I remember chasing a tiny spider around my living room, trying to get that perfect shot. It’s a game of patience and precision, but oh, when you nail it, it’s pure gold.
There’s a couple of tricks up the sleeve for achieving that pin-sharp focus, and we’ll dive into manual settings and a nifty technique called focus stacking. Both are game-changers for capturing those minute details that make macro photography so fascinating.
Achieving Pin-Sharp Focus with Manual Settings
When I’m out and about, trying to capture something as minuscule as a spider in my living room, auto-focus just doesn’t cut the mustard. That’s where manual focus comes into its own. You see, with a 100mm macro lens, you’re able to get close enough while maintaining a comfortable distance, so you don’t scare the living daylights out of the creature you’re trying to photograph. It’s all about gentle adjustments, moving the camera’s lens back and forth ever so slightly until the subject comes into sharp relief. So set the focus to your fave distance, then put the camera to your eye and move slowly towards the subject… it’ll eventually get sharp, then soft, so move back… sharp again, then soft…
It’s a bit like tuning a radio – too far one way, and you’ve lost it, but get it just right, and the clarity is astonishing. The trick is patience and a steady hand, or better yet, a tripod to eliminate any shakes. That, and a good dose of practice, will have you taking macro photos with confidence and precision.
Maybe use “rapid fire” on your camera and move whilst you do it – get slices of sharpness
The Innovative World of Focus Stacking
Now, focus stacking is where things get really interesting. It’s perfect for when you’ve got your camera on a tripod, aiming at something that won’t skedaddle at the drop of a hat. My Canon R5 has this smashing built-in stacking feature, which is a bit like magic. You take multiple shots at different focus points, and then, with a bit of wizardry in Photoshop or Helicon, you combine the images. The result? A photo with front-to-back sharpness that’s just not possible with a single shot.
This technique is a boon for stationary subjects, allowing you to capture an incredible depth of detail. It’s like seeing the world through a magnifying glass. Each layer of the image is in focus, from the tips of a spider’s legs to the farthest reaches of its web. The process might seem daunting at first, but once you get the hang of it, it opens up a whole new world of possibilities for your macro photography.
The Macro Photographer’s Playbook

Tips and Techniques for Beginner Macro Photographers
For those just dipping their toes into the world of macro photography, here’s a bit of advice: start simple. Your camera’s lens is your best mate here, and a decent macro lens can make a world of difference. But don’t forget about the little helpers like a ring flash for illuminating your subjects. Practice taking macro photos in your garden or local park – you’ll be amazed at what you can find. And honestly, there’s nothing quite like the thrill of capturing a dewdrop on a leaf in stunning detail. Keep experimenting, and don’t be afraid to get down on your knees for the perfect shot. It’s all part of the adventure.
Getting Closer: The Thrill of Super Macro Photography
There’s something utterly compelling about super macro photography. It’s like opening a door to a hidden world, one that exists right under our noses. I often take my camera for walks in the park or the woods, always ready to kneel down for the perfect shot. It’s not just about capturing an image; it’s about capturing a moment, a secret slice of life that most folks overlook.
On one such walk, I stumbled upon a spider, no bigger than a crumb, spinning its web in the corner of a fence. The thrill of getting that super close-up, seeing the intricate patterns of its web, and the vibrant colors of its tiny body was unmatched. It’s moments like this that super macro photography brings to life, offering a glimpse into the extraordinary details of the natural world.
And here’s the kicker – you don’t need to go far to find these moments. They’re in your backyard, on your windowsill, or in the park down the road. With a bit of patience and the right technique, you can capture these wonders. So, grab your camera, and let’s delve into the tiny, fascinating world of macro photography together.
Experimentation with Creative Techniques
Experimentation is the spice of life, especially in macro photography. It’s all about playing with different techniques to see what works best for you. For instance, a shallow depth of field can transform a mundane subject into a masterpiece, blurring out distractions and focusing solely on the beauty of your macro subject. It’s a bit like focusing on the lyrics of a song in the midst of a bustling crowd – everything else fades away, leaving only the essence of the moment.
And don’t be shy about taking multiple shots from various angles and with different settings. Each photograph tells a story, and the more you experiment, the more stories you’ll have to tell. Sometimes, I find myself taking dozens of photos of the same subject, each one revealing something new and exciting. It’s this process of discovery and learning that makes macro photography so rewarding.
Post-Production Perfection

Editing Macro Photos: Enhancing the Minute Details
Editing macro photos is a bit like being a detective, searching for clues on how to enhance the minute details without losing the essence of the photograph. It’s a delicate balance, but when done right, it can transform a good photo into a great one. Enhancing the colours while keeping an eye not to overdo it is key. It’s about accentuating the beauty that’s already there, not creating something entirely new.
As for photographing insects or other tiny subjects, the challenge lies in bringing out the textures and patterns without making the image look artificial. Nature photography is all about celebrating the natural world, and your editing should reflect that. Keep it simple, focus on the details, and always, always steer clear of over-sharpening – it’s just not worth it.
Using Lightroom to Bring Out the Best in Your Macro Photography
Lightroom is my go-to tool for giving my macro shots that extra bit of sparkle. It’s fantastic for the basics, like adjusting the exposure or tweaking the contrast. But where it really shines is in its ability to handle the edits for a series of photos, especially if you’ve been dabbling in focus stacking. If you’ve taken multiple shots of your subject at different focus points, Lightroom lets you sync the edits across all the images before you export them to Photoshop or Helicon for merging.
This streamlined process ensures that every layer of your focus-stacked image maintains the same look and feel, resulting in a high-quality macro photograph that’s consistent and beautifully detailed. And let’s not forget about the electrical connection between your camera and the software, making the transfer of your photos seamless and hassle-free. Cameras have a macro setting, but it’s the post-production work in Lightroom that truly brings out the best in them.
So, whether you’re working with a Canon 100mm lens for that maximum magnification or employing reversing rings for creative macro shots, Lightroom is an invaluable tool in your post-production arsenal. It’s all about enhancing those details and making your macro subjects pop. After all, if you’ve put in the effort to capture those incredible close-ups, it’s only right you give them the post-production treatment they deserve.
Showcasing Your Macro Photography

After all is said and done, showcasing your macro photography is the cherry on top. It’s your opportunity to share the beauty and intricacy of the micro world you’ve captured with others. Building an impressive macro photography portfolio is not just about displaying your work; it’s about telling the story of your journey into the tiny, often overlooked details of nature and life.
And when it comes to sharing your macro work online, remember it’s not just about the likes or follows. It’s about connecting with others who share your passion, inspiring and being inspired in return. Whether it’s through social media, a personal blog, or photography forums, sharing your work brings it full circle, from the thrill of the capture to the joy of sharing the moment. So, go on, put your work out there, and let the world see the beauty through your lens.
Building an Essential Macro Photography Portfolio
Now, let me tell you about the time I captured a tiny spider in me living room. It was a proper adventure, right in me own home. Every time I head out, or even just potter around the house, I make sure to export me best shots into a folder. It’s like collecting bits of treasure; before you know it, you’ve got a chest full. And it’s not just for keeping to yourself, either. Getting your work out there, like on REDBUBBLE, can turn your passion into a bit of pocket money. Selling your work isn’t just about the dosh; it’s about sharing the beauty you’ve captured, like that tiny spider, with the world.
I reckon the key to a standout portfolio is diversity and quality. You don’t want twenty shots of the same scene. Mix it up with various subjects, angles, and techniques. That spider in me living room? It’s among me top shots because it’s unique and showcases a moment most would overlook. Remember, your portfolio is your showcase to the world. Make it as impressive as you can, with each photo telling its own little story.
Sharing Your Macro Work: Tips for Online and Social Presence
Alright, let’s chat about getting your work out there on the likes of Instagram and such. It’s a cracking platform for photographers. The trick is consistency and engagement. You can’t just throw your photos up and expect the world to take notice. Share the stories behind the shots, like me tale of the living room spider, engage with your followers, and use those hashtags wisely. It’s not just about showing off your work; it’s about building a community of folks who appreciate the tiny wonders you capture.
And don’t forget, feedback’s a two-way street. Take the time to appreciate and comment on other photographers’ work as well. It’s not just polite, it’s how you build relationships and learn. You might even get a few tips on capturing something as mundane yet fascinating as a spider in your living room. Plus, the more you engage, the more you understand what your audience loves, helping you refine your own style and approach.
Final Insights on How to Do Macro Photography

So, you’ve made it this far, ey? Well, let me wrap it up with a bit of wisdom. Macro photography, like capturing that cheeky spider in me living room, is about patience, practice, and a keen eye for detail. Whether you’re using digital cameras, playing around with natural light, or experimenting with close-up filters and a reverse lens, the key is to always be learning and experimenting. And let’s not forget about sharing those macro photography ideas as we head into 2024. The world’s always changing, and so are the ways we can capture it.
Remember, every photo you take, every subject you zoom in on, it’s all adding to your skill set. Don’t be disheartened by the misses; they’re just stepping stones to your next great shot. And when you do capture something spectacular, share it, sell it, and let it inspire others. Macro photography’s a journey, not just a destination. Keep at it, and who knows what you’ll find in your living room or garden next?
Continual Learning and Practice: The Path to Macro Photography Excellence

Right, if there’s one thing I’ve learned over the years, it’s that the path to excellence in macro photography—or any kind of photography for that matter—is paved with continual learning and practice. It might start with understanding your camera body, fiddling with the macro mode on your DSLR camera, or getting your head around aperture settings and how they affect shooting macro images. Every photo that appears on your camera sensor is a lesson in itself. And let me tell you, sometimes the subject might cast a shadow or not turn out as you expected, but that’s all part of the dance.
Take inspiration from examples of macro photography, dive into food photography tips, or marvel at close-up photographs that make you feel like you’re seeing the world for the first time. The relationship between your lens and your nearest subject, achieving that magnification closer than you thought possible, it’s all a thrilling part of the journey. Interchangeable lenses, portrait lenses—they’re all tools in your kit, ready to help you capture the magic of the minuscule. So, keep at it, practice, and always be ready to learn something new. That’s the true spirit of macro photography.
Frequently Asked Questions
What is true macro photography?
True macro photography involves capturing photographs where the subject is represented at a 1:1 magnification ratio on the sensor. This style of photography allows you to capture detailed and close-up images of small subjects, emphasizing features that might be invisible to the naked eye.
Can you provide some macro photography tips for beginners?
Absolutely! If you’re new to macro photography, start by using a tripod to stabilize your camera, which is crucial for sharp images. Experiment with depth of field to enhance your macro photos, and consider using macro lenses include options like 100mm prime lenses which offer true macro magnification.
How can I shoot macro photos without a macro lens?
To shoot macro photos without a dedicated macro lens, you can use extension tubes or a reversing ring to increase magnification. These accessories are affordable and can be used with your existing lenses to achieve a macro effect.
What are some good macro subjects to start with?
Flower photography is a great starting point for macro enthusiasts. Flowers are accessible, come in various shapes and colors, and they don’t move much, making them perfect macro subjects to practice your skills.
What equipment do I need for macro photography?
Essential equipment for macro photography includes a macro lens or lens with macro capabilities, a sturdy tripod, and possibly a macro flash to illuminate your subjects evenly. Additionally, a focusing rail can help with precise adjustments when shooting up close.
What are some indispensable macro photography tips?
Some indispensable macro photography tips include using manual focus for better control, understanding the lighting, and practicing patience. Also, explore different angles and compositions to capture unique macro shots.
How do I enhance my macro photography techniques?
To enhance your macro photography techniques, consider learning about and experimenting with different lighting setups, such as using diffusers and reflectors. Additionally, practice focusing techniques like focus stacking to increase depth of field in your images.
What’s the difference between macro photography and close-up photography?
Macro photography specifically refers to capturing images at a life-size magnification or greater, while close-up photography can include any photo where the subject is shot closer than usual, but without achieving true macro magnification.
Can macro photography be done with any camera?
While dedicated macro lenses and DSLRs or mirrorless cameras often yield the best results, you can practice macro photography with almost any camera. Some compact and even mobile phones come equipped with macro settings or lenses suitable for close-up photography.
How can I take macro photography to the next level?
To take your macro photography to the next level, invest in higher quality equipment, learn advanced techniques such as focus stacking, and immerse yourself in macro photography communities to learn from experienced photographers. Studying subjects for macro photography, like insects and water droplets, can also offer challenging but rewarding opportunities to improve your skills.
Related Posts

Why constant-aperture ZOOM Lenses are the best
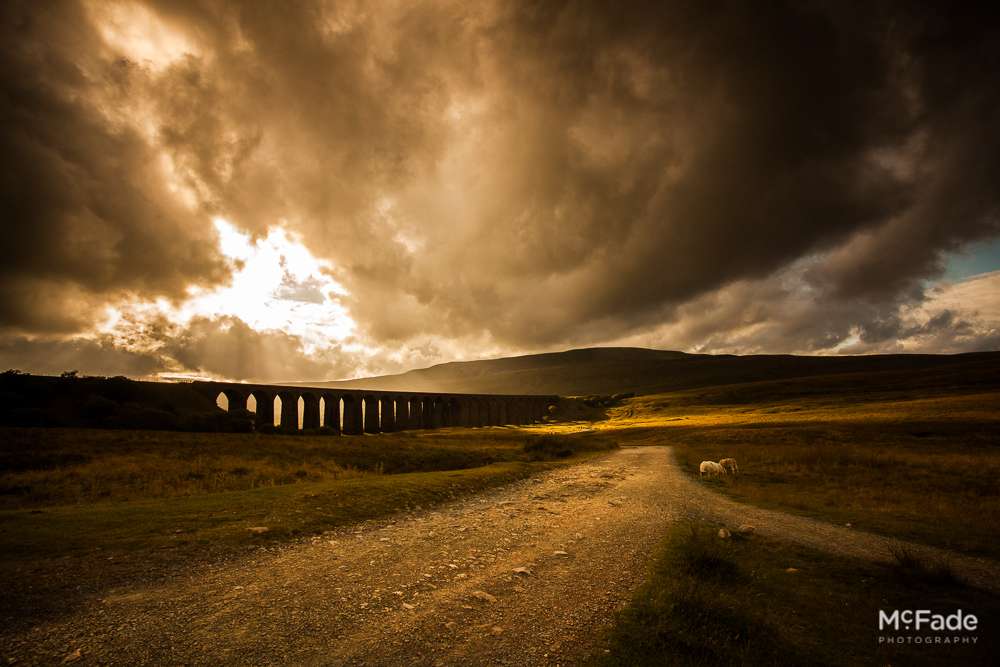
A Stunning Yorkshire Dales Day – Ribblesdale and Malham- Wedding Photography for Sophie and James
Trinity Leeds – The New Shopping Centre Goes LIVE!
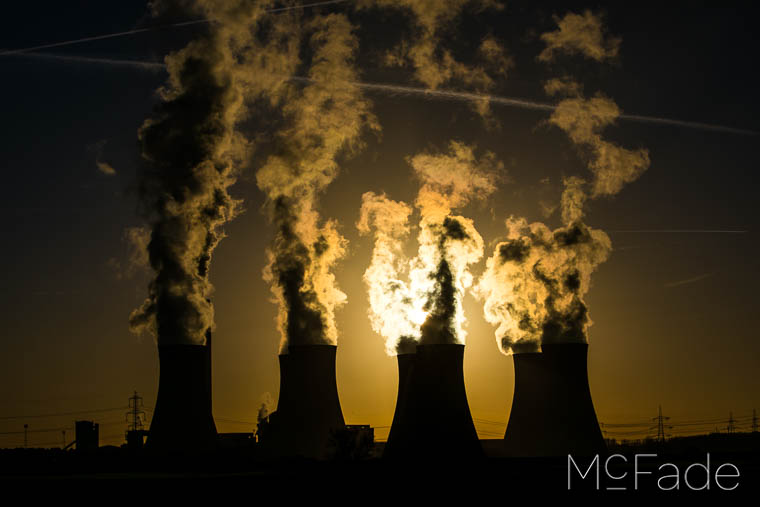
The 5 Stop Power Station Sunset Experience- Photography in the Lyric, Leeds

5 – Flash Addicts – Strobists…
5 Photos from Ribblesdale – the McFade Workshop