Transforming Digital Photos with Dehancer: A First Look and Review
With digital photography, everything is sharp, clear, and often clinically perfect. Conversely, there’s something deeply nostalgic about the look of film. Whether it’s the grainy texture, the warm tones, or the slightly faded colours, film brings a sense of history and emotion that digital often struggles to replicate.
Enter Dehancer—a film emulation software that promises to bring that classic film look to your digital photos with ease.
Today, I’m sharing my first experience with Dehancer, using it within Lightroom to breathe new life into some recent shots from Morecambe Bay and beyond.
This is a recording of my first use and impressions – I’ve used the transcription to create this blog, so if you’ve not got 45 minutes to watch, then below is a summary of what’s in the video
https://www.youtube.com/watch?v=CdOPG6rgz7s
What is Dehancer?
Dehancer is a comprehensive film emulation software designed to mimic the look and feel of traditional film photography. It’s available across multiple platforms, including Photoshop, Lightroom, Capture One, and Affinity Photo, making it accessible to a wide range of photographers. For video enthusiasts, it also works with DaVinci Resolve, Final Cut, and Premiere. As someone who’s always appreciated the vintage aesthetic, even though I never shot on film myself, Dehancer seemed like the perfect tool to experiment with.
Setting Up Dehancer in Lightroom
Installing Dehancer into Lightroom was straightforward enough. It functions as an external editing tool, much like how you’d set up Photoshop. After downloading the software and following the instructions in the provided zip file, I added Dehancer to Lightroom’s external editing menu. From there, it was just a matter of right-clicking on any photo, selecting “Edit in Dehancer,” and I was ready to go.
Testing the Film Emulation on Different Photos
Photo 1: The Fisherman at Morecambe Bay

My first test subject was a photo of a fisherman at Morecambe Bay. After opening the image in Dehancer, I was greeted by an extensive list of film profiles—everything from classic camera films to cinematic stocks.
The choice was overwhelming, but I eventually settled on the Fuji Velvia 50 profile. It added a lovely warmth to the image, enhancing the browns and yellows in the scene, which complemented the timeless feel of the fisherman’s surroundings.
The before-and-after comparison was striking, transforming a standard digital shot into something that looked like it could have been taken decades ago.
Photo 2: Seashells on the Beach

Next up were some close-up shots of seashells, a completely different kind of subject. I reset the settings to default and started fresh.
The presets in Dehancer proved to be incredibly useful here, giving me a quick way to explore different looks before fine-tuning. I ended up choosing a preset that added a subtle vignette and enhanced the texture of the shells without overwhelming the natural colours.
A bit of added contrast and gamma correction brought out the detail in the image, making it pop just the right amount.
Photo 3: Portrait of Mum

For a portrait of my mum, I aimed for a nostalgic, holiday-in-the-70s kind of vibe. Dehancer’s film compression and colour head tools were instrumental in achieving this look.
By adjusting the shadows and adding a touch of magenta, I was able to create a warm, inviting tone that really suited the scene. The grain feature was also a standout here, adding just enough texture to make the photo feel like a genuine relic from the past.
Photo 4: Lake District Landscape

Finally, I tackled a landscape shot from the Lake District. The original photo was a bit flat, taken on an overcast day, but Dehancer turned it into something much more atmospheric.
Using the film compression and print tools, I brought down the brightness of the sky and added contrast to the rocks in the foreground. The film grain here was subtle but effective, giving the image a timeless quality that matched the grandeur of the scene.
Key Features of Dehancer
Throughout my testing, several features of Dehancer stood out:
- Film Grain: Dehancer’s approach to film grain is nothing short of impressive. The grain is beautifully rendered, with options to adjust its intensity separately in shadows, mid-tones, and highlights.
- Halation and Bloom: These effects, more commonly seen in video, add a subtle glow around bright areas, giving images a dreamy, cinematic quality.
- Vignette: A classic tool that Dehancer handles with finesse, allowing for precise adjustments that can draw the viewer’s eye exactly where you want it.
- Colour Head: This feature lets you shift between blue/yellow and green/magenta tones, offering fine control over the image’s overall warmth and mood.
Phone App
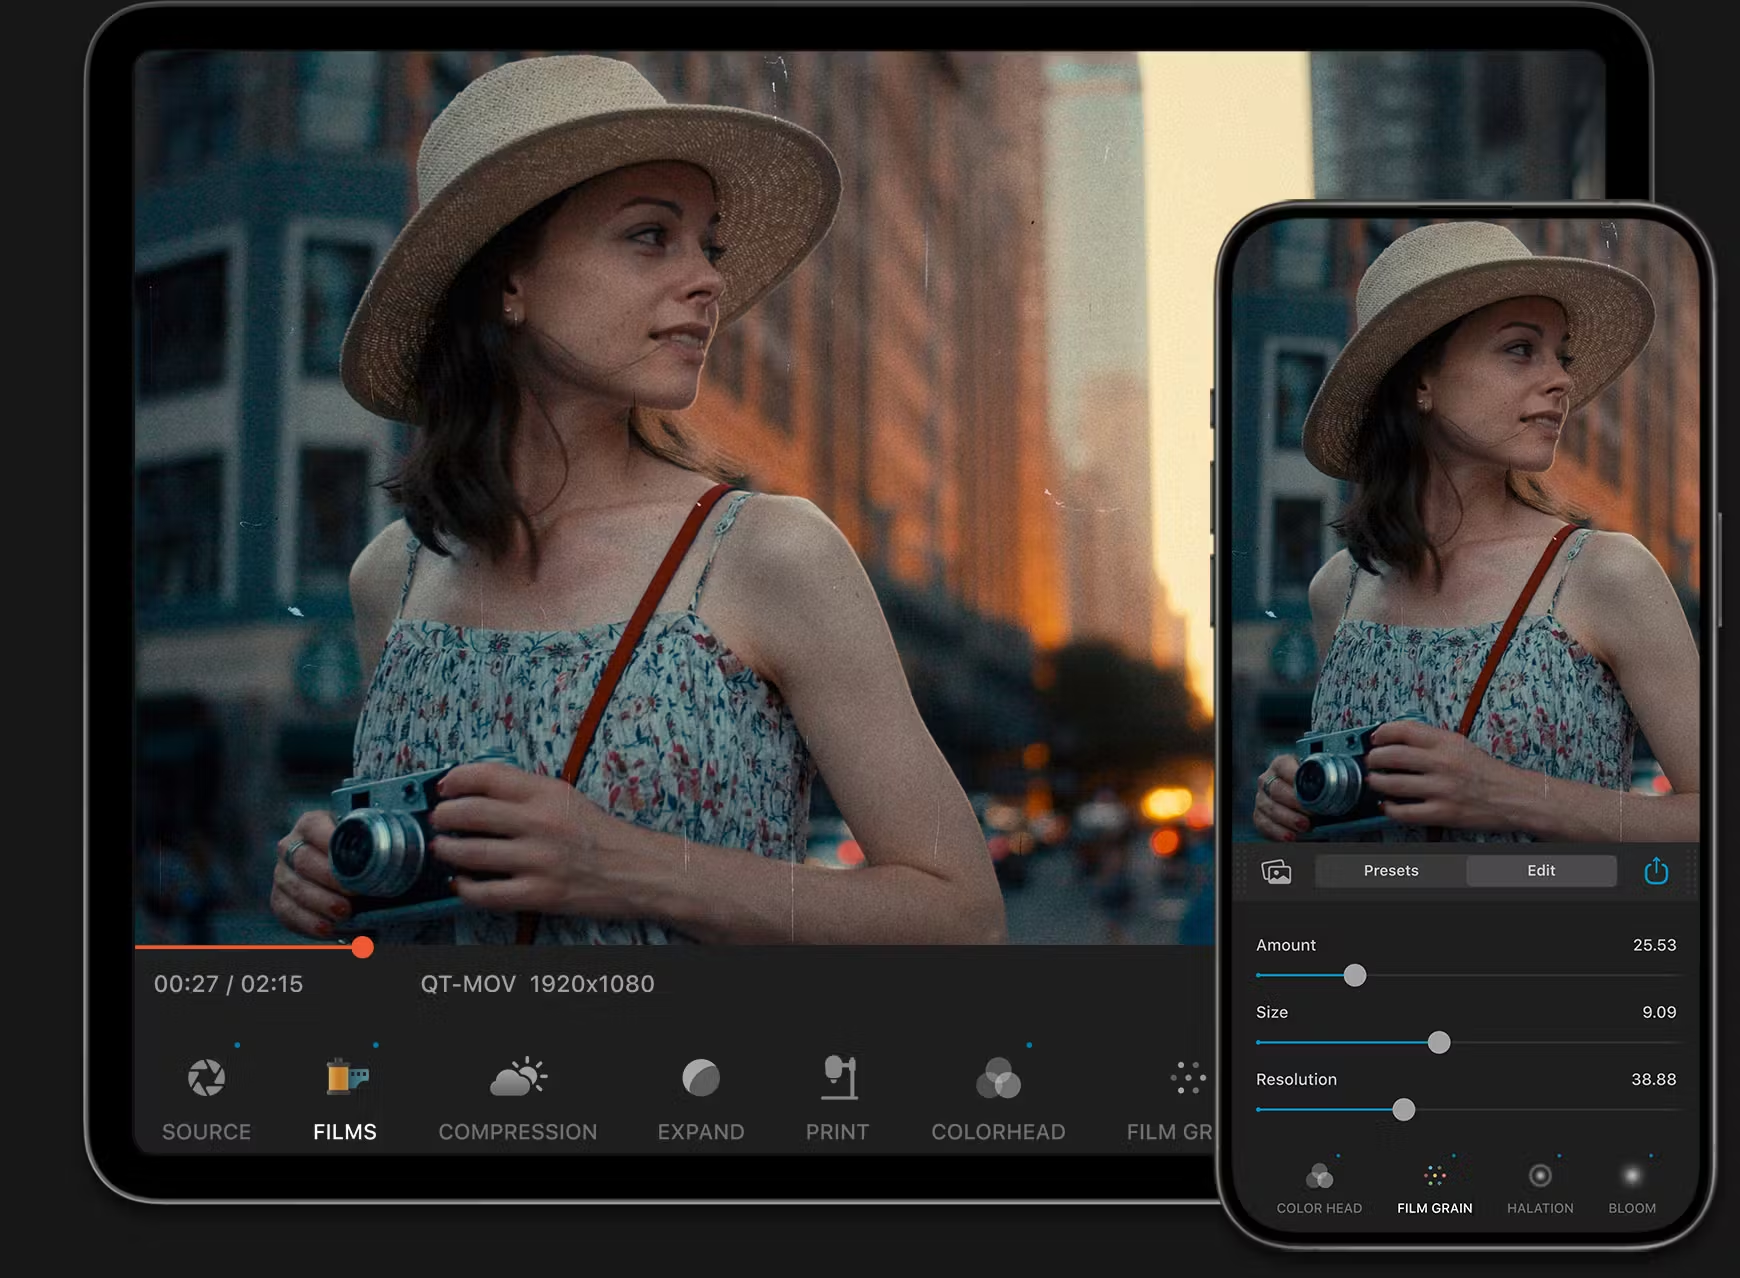
In addition to its desktop offerings, Dehancer provides a powerful mobile app available for iOS devices, designed for both photo and video editing. The app features over 60 film profiles and vintage presets, along with pro-level tools like Film Grain, Halation, Bloom, and Film Damage. This mobile app delivers a full film lab experience directly on your iPhone or iPad, allowing you to create authentic film looks with just a few taps. It’s a versatile and time-saving tool perfect for on-the-go editing. Check it out here.
Final Thoughts
After spending some time with Dehancer, I can confidently say it’s one of the most effective tools I’ve encountered for achieving a genuine film look.
It’s intuitive, yet offers deep control for those who want to dive in and really fine-tune their edits. For anyone looking to add a touch of nostalgia to their digital photos, Dehancer is well worth a try.
That said, like any powerful tool, there’s a bit of a learning curve, especially if you’re used to traditional photo editing software. But once you get the hang of its unique features, the creative possibilities are vast.
Conclusion
If you’re someone who loves the aesthetic of film but works primarily in the digital space, Dehancer could be a game-changer. It transforms digital photos, making them feel more organic and less clinical—perfect for adding that extra artistic touch. I’m excited to explore it further, particularly in Photoshop and DaVinci Resolve, where I’ll be experimenting with video footage next.
Go on then… one more….


