3 Weeks with a Drone….
So I got one – I saw just how small the “mavic air” is on Youtube and thought the time had come!
Reasons why I got one…
- It really does fit in your hand
- Has a 12Megapixel camera which shoots RAW
- 4K movies
- Simple to use for a beginner
- Masses of functionality – things like following a moving object, or “tap fly” means the drone takes great footage without you driving!
- Manual camera settings – you set the exposure
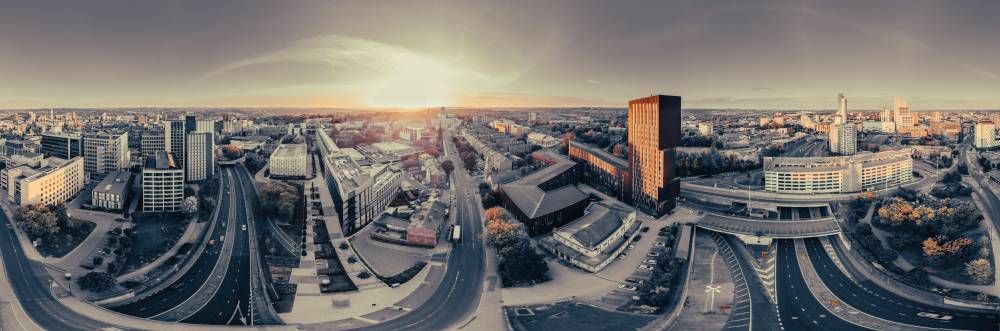
- Panoramic photos – it can do 360, 180 or around 70-degree panoramics – the 180-degree shots take 21 RAW files which Lightroom happily blends
- You can fit a polariser!
- Something “new” to challenge my creativity
This was a 180 Degree pano – cropped in a little

This is a “Horizontal pano” with 9 photos

Taking Photos
It’s really like having a massive tripod
One you can put anywhere in 3D space! The drone is pretty easy to control once you have a few hours practice – it just stays where it is until you move it.
- the controller has 2 joysticks, one moves it up and down, and rotates it on the spot
- the other “drives” it forwards, backwards or side to side.
- there’s also the “gimbal”, the camera by any other name. You can rotate this 90 degrees to point straight down or straight ahead. There’s a wheel on the controller for this
- You use your phone or Tablet to view what’s going on – a powerful app
So that’s the basic controls in a nutshell
Composing photos is just like on land – you use the rules as normal, looking for streams, roads and paths for “lead lines”, using the “rule of thirds” to make things balanced.
My process (so far!)
- find somewhere legal and interesting to shoot – it’s mainly fields and moors at the moment
- get near to the thing – so reservoir dam, tree, stream, waterfall…
- send the done up vertically to be higher than trees and overhead cables – 70 feet is usually ample
- drive it over to the “thing” and have a look around – just like you’d do on the ground.
- get the drone facing the thing – then use the “high or lower” and “move left/right” controls to help with composition – you can use the gimbal too, but I usually shoot “straight” – see why in step 7
- now set the exposure – the phone shows clipping of highlights, so in M metering, just increase the shutter speed till the clipping disappears
- I choose “panoramic” from the stills menu – this means you get the choice of a few panoramic views – the horizontal one is very useful, takes 9 shots and looks great.
- Once it’s finished that shot – move! Don’t keep taking the same shot over and over….
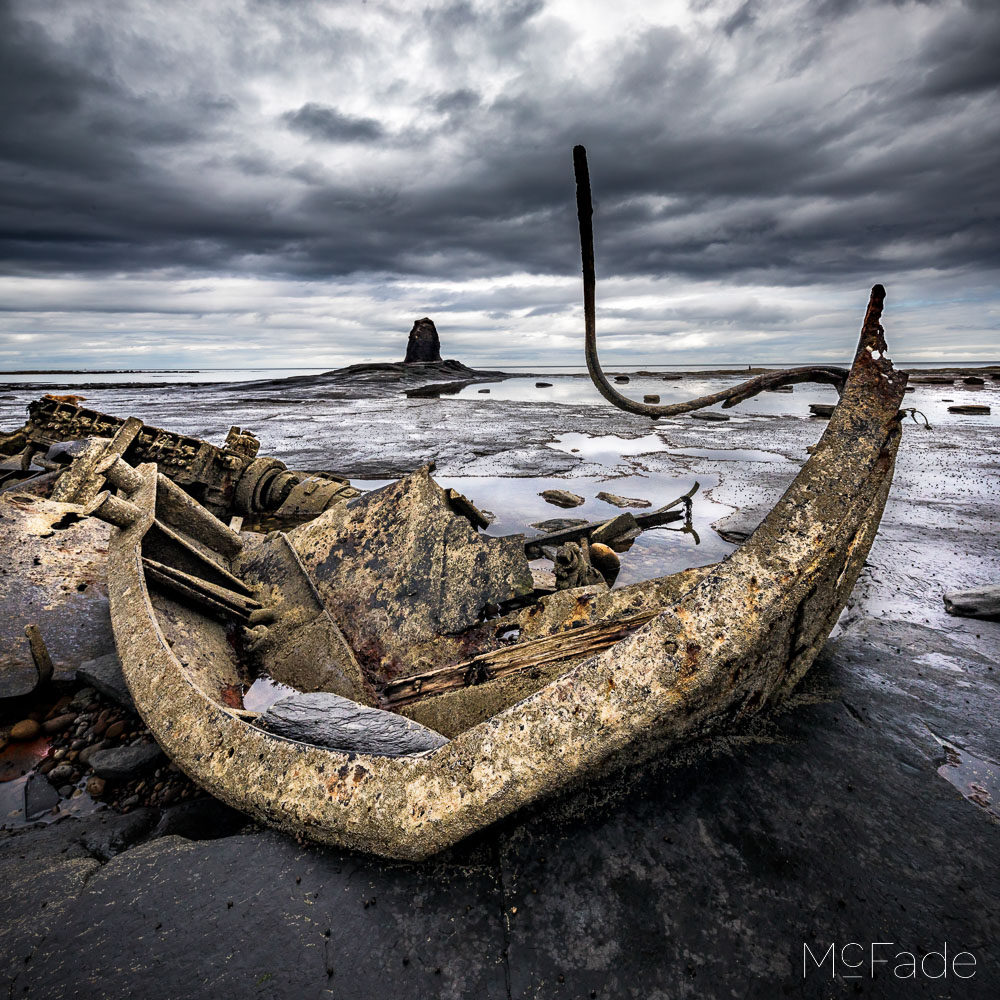
A few from the Lake District
I took it to the lakes this weekend – forgot to charge the controller so didn’t get as much as I wanted to, but managed some on Newlands and Crummock Water


Saddleworth Moor Panoramics
I’ve photographed these reservoirs many times, just not from 200 feet in the air so was keen to go try it


Pontefract Racecourse Panoramics
A park location with lake – I just like water shots…


Issues I’ve Faced
Finding interesting stuff that’s legal
The laws prevent you from getting close to property and people – so you can’t just pop into Leeds and shoot the town hall from above – which is gutting as that’d be awesome! So you have to find open spaces with things in – that probably means a fair drive out from the city you live in before you get something exciting. Add to that you only get 20 minutes per battery (I’ve got 3) you are a little reluctant to drive 1 hour – shoot for an hour – then drive an hour back! I’ve just ordered a car charger though so that may change!
Worrying about other people
I’m new to this so having dog walkers and ramblers nearby when you’re doing it seems a bit wrong… what if something goes wrong? And will they moan about the noise? The actual truth is most people are “interested” and enjoy looking at your phone if you show them. So I’m gradually getting closer to them, though never within 50m of anyone as that’s illegal
Communications between the controller and drone
This is usually fine if you use the controller you get in the box – though at Crummock Water, it did lose comms mid flight… thankfully the drone just came home and landed itself. That’s a godsend. I then had to use the phone on its own – the drone has wifi and can talk directly to the phone. I attempted this twice, following the instructions to the letter – on both occasions it took over 30 minutes of struggle and worse, it wasted 1/2 the drone battery whilst it sat on the ground. I’m sure this is a learning curve, the main lesson being has a micro USB charger in the car for the controller….
Lighting and sky burnout
This is a pain for any landscaper really – you expose for the sky, you get dark land – and vice versa with a white sky… The land-based photographer can use ND Grad filters to darken the sky, leaving the land normal. You can’t do this with the drone and do panos…. It DOES do HDR, and saves the braceted images for you – and the files are RAW so you can do a fair bit with them. if you’re used to a Full frame RAW file though, you’ll be amazed how like a 2006 camera these files are… not great with noise.
Should you get one….
Like anything, they’re getting smaller and cheaper with time. The Mavic Pro 2 is around £1500 – the Air is £1000 with 3 batteries and DJI have a Spark which is cheaper still. They are surprisingly easy to use and safety is built in – they have sensors to stop them crashing – though you can switch them off and trash if it you like.
It’s great fun but you do need to find places to do it – so if you’re not adventurous then it’s probably not for you.
If you’ve fallen out of love with photography, it does give you a new angle on the hobby – literally!
However – you may need to register and pay for a licence in 2019…. be ready for that.